Moving My Blog to 11ty - Part 2 (Structure and basic config)
This is part of a series on moving this blog from GitHub Pages (which uses Jekyll) to 11ty. You can read the overview of this project here.
Filling out the structure
In part 1 of this series, we got to the point of having basically an empty shell of a website. It’s accessible via a URL on the public internet, and we can also run it locally on our machine, but there’s not really anything in it. So the first thing we want to do is set up the file structure that will power the site.
One of the nice things about 11ty vs. Jekyll is that there is a lot more flexibility on where your content lives. So I can simply create subfolders and 11ty will automatically find any markdown files in there and turn them into webpages. This allows me to fulfill one of my project requirements (just a personal preference, really), that my posts be under a folder called blog instead of posts.
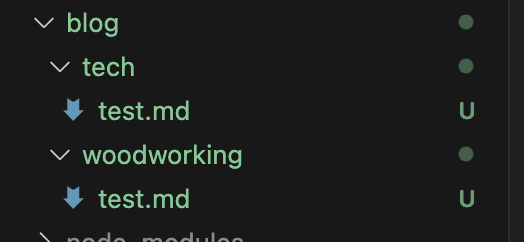
I also can create multiple sections of the blog using subfolders. This fulfills the requirement that I have the ability to separate topics. So I created folders for tech posts and woodworking posts. I then threw a super basic markdown file in each folder so I could confirm that 11ty picks them up and renders them properly, which it does.

As an aside, you might wonder why I am not just using categories to separate out the different sections like tech and woodworking. I wanted the flexibility of being able to use categories in each section, not to define the sections themselves. For example, under tech I might want categories like web development or security or app spotlight, etc. But I’d like to be able to have those categories only defined under the tech section of the site. It also gives me more ways to break up the navigation.
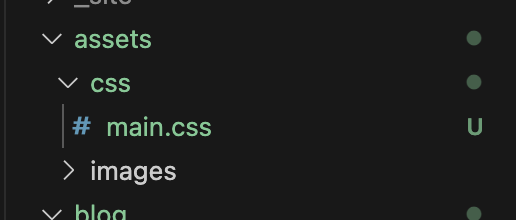
The next thing I needed to do is add a place for my static elements, like my CSS files, images, file attachments that I choose to upload, etc. I decided to name this folder assets. So I created that folder, along with a couple of subfolders, and threw a super basic CSS file in there so I can confirm it works. And I also updated the index.html file I had created previously to include that stylesheet.
The site did not actually pick up my stylesheet, and we’ll work on fixing that next.
Establishing the Eleventy Config file
As we proceed through the development process, we’ll need to make certain adjustments to 11ty’s default behavior. This might be for things like adding plugins, specifying default folders, or other things. The issue with the stylesheet is one of the things that can be fixed in the config file.
11ty’s documentation discusses building this file and many of the ways you can use it. I’m creating a file called eleventy.config.js and initializing it with the following code:
1
2
3
export default function(eleventyConfig) {
    // configs will go here
}
As I have need for customizations, I will add them into this document. We’ll go through a couple here to get us started.
Enabling passthrough files
Returning to the specific issue of my CSS file not being processed, this is because 11ty doesn’t pass raw files through to the output directory as it builds the site. Obviously in the case of the CSS file, we do need it to do that so it can be referenced by the theme templates. The same would be true of things like fonts, javascript, etc. We will enable passthrough of the assets folder by adding the following line to our eleventy.config.js file. You can see more about this command in the documentation.
1
eleventyConfig.addPassthroughCopy("assets")
After saving that change, I was able to see that the CSS file was visible to the browser.
Prepare for writing templates
One of the wonderful things about static site builders like 11ty is that you don’t have to code the layout of each page. We can create templates that are reused for multiple pages. But in order for these to work as expected, we have to set up the folder structure and define that in our eleventy.config.js file. We can do this by adding the following section outside of the export default section. I am choosing to enable both a _layouts folder for the main templates as well as an _includes folder for subcomponents that get called by the main templates. This is just my personal preference. 11ty recognizes the _includes directory out of the box, so you can skip this step if you’d like.
1
2
3
4
5
6
export const config = {
  dir: {
    includes: "_includes",
    layouts: "_layouts",
  }
};
Now that these folders are set up, we can start building templates. Some brief thoughts on this will take place in a subsequent article.
Enabling relative links
One of the things that will make writing blog posts easier, specifically when linking other blog posts, is to set up 11ty so that it correctly interprets relative links. This will allow us to link to /blog/tech/article1.md, for example, and 11ty will rewrite that link to point to the rendered page. By default it will leave that link as it originally was, and since the markdown pages aren’t published in their raw form, the page isn’t found.
In order to resolve this issue, we will install the InputPathtoURL plugin that 11ty ships. We can do this by adding the following to our eleventy.config.js file.
1
2
3
4
5
import { InputPathToUrlTransformPlugin} from "@11ty/eleventy";

export default function(eleventyConfig) {
    eleventyConfig.addPlugin(InputPathToUrlTransformPlugin);
};
Note that there can only be one
export default function(eleventyConfig)function, so you’ll just put in the import line at the top, and then add the addPlugin line inside your existing eleventyConfig function.
After saving this config change, you’ll notice that links to your .md files are rewritten as directories.
Wrap-up
That’s a wrap on today’s changes. We’ve set ourselves up with the basic structure to proceed with developing templates/layouts that we can use to build our site. Next time I’ll hopefully be able to write a little bit about how I’m writing my templates.